When homeowners ask, “why are my solar lights not charging,” the answer is rarely just “bad weather.” A shaded panel, dusty glass, a switched-off unit, or an aging rechargeable battery can all reduce nighttime brightness. A light tucked beneath a porch roof may receive only a thin strip of afternoon sun. Even a film of grime can matter on a small panel. The symptoms can look alike, though the causes are different.
Professional research offers useful context, but it needs careful interpretation. In a review of photovoltaic module studies, National Renewable Energy Laboratory researchers Dirk Jordan and Sarah Kurtz reported, “The median degradation rate is 0.5%/year” (Progress in Photovoltaics, 2013). That figure describes larger PV modules, not the tiny panels inside garden lights. It should not be treated as a lifespan estimate for a solar lamp. Still, it highlights a practical point: solar components can lose performance over time, while short-term charging problems may come from shade, dirt, or battery condition instead.
Small clues help. Check whether the panel faces open sky, whether leaves cast moving shadows, and whether the light’s switch is on. Then clean the panel gently and compare its brightness after a clear, sunny day. Not every test gives a definite answer. This guide examines the top ten reasons solar lights fail to charge, with simple checks to help narrow down the cause before replacing parts.
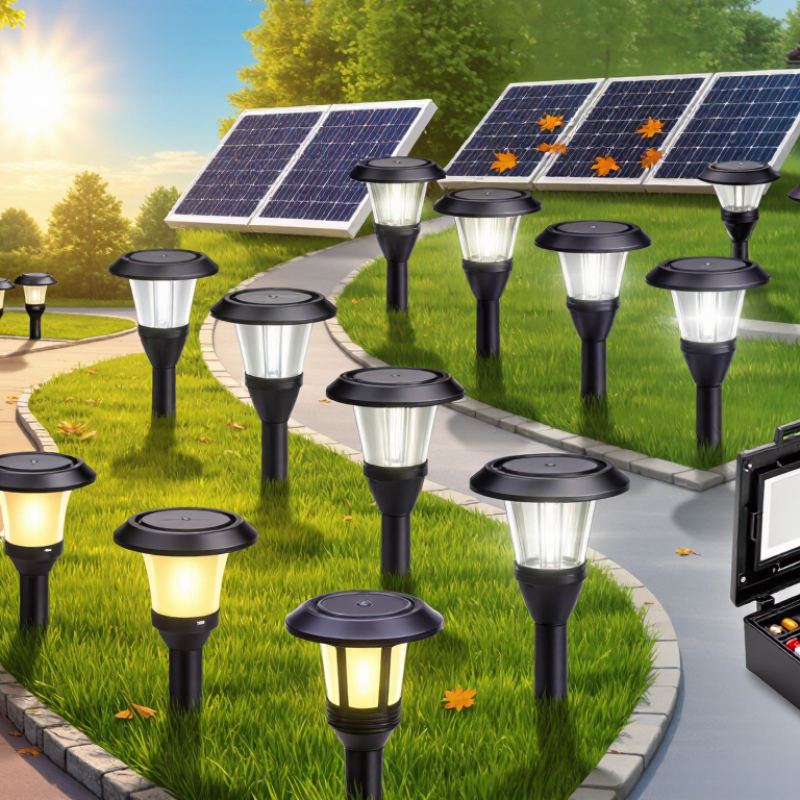
Top 10 Reasons Why Are My Solar Lights Not Charging?
Solar lights collect energy through a small photovoltaic panel. Sunlight creates electrical current, which passes through a charging circuit and fills a rechargeable battery. The battery then powers the LED after sunset. This process is simple, but every stage matters. I have found that a panel can look bright while receiving too little direct sunlight.
Shade is a common problem. Nearby walls, leaves, and window frames can reduce charging sharply. Dust, bird residue, or dried rain can also block light. The panel may face the wrong direction, sit at a poor angle, or receive short winter daylight. Cloudy weather affects output too. A switched-off unit, loose wire, damaged panel, or corroded contact can stop the flow. Water inside the housing is another warning sign. So is extreme heat or cold.
The battery may be old, deeply discharged, or incompatible with the light. Some lights also use stored energy during the day because their sensor fails to detect sunlight. Check the power switch, then clean the panel with a soft damp cloth. Place the light where direct sunlight reaches it for several hours. Inspect contacts carefully and allow wet parts to dry completely. If charging remains weak, test the rechargeable battery with a suitable meter. Do not assume the panel is faulty. My first diagnosis is not always right; measuring the battery voltage often reveals the real cause.
Solar lights collect sunlight through a photovoltaic panel, store energy in a rechargeable battery, and use that stored energy to power LEDs after dark. The chart shows a practical diagnostic priority index from 0 to 100, based on how strongly each issue can prevent normal charging.
Start by placing the panel in direct sunlight and cleaning its surface. Then check the power switch, battery condition, wiring, charging contacts, and whether nearby artificial light is keeping the light from entering charging mode. Rechargeable batteries commonly lose capacity over time, especially after repeated outdoor temperature changes.
To check whether your solar lights are charging, inspect the panel during daylight. It should receive direct sunlight, not sit beneath a porch roof or leafy branch. Wipe away dust, water spots, and bird droppings with a soft, damp cloth. Make sure the light’s switch is set to ON; some models will not charge in another setting. Charging is usually invisible, so a dark indicator does not always mean something is wrong.
Tips: Leave the lights in full sun for six to eight hours, then test them after dusk. Keep nearby lamps off, since bright light can fool the built-in sensor into thinking it is still daytime. Compare several lights in the same spot. If only one fails, its battery or wiring may need attention.
For a closer check, consult the product instructions and look for a charging indicator, if fitted. You can also test a removable rechargeable battery with a suitable battery tester or multimeter, following its safety instructions. Never replace it with a non-rechargeable battery. I have found that a panel can look sunny while a narrow shadow crosses it for hours; it is easy to miss. If the light still fades quickly after a clear, sunny day, the battery may be worn or the panel may need inspection.
Use this troubleshooting table to identify common charging problems and check whether a solar light is receiving enough daylight to recharge.
| No. | Possible reason | How to check | What to try | How to tell whether it is charging |
|---|---|---|---|---|
| 1 | Insufficient direct sunlight | Check whether the panel is shaded by a roof, tree, fence, or nearby building during the day. | Move the light or panel to a sunnier location with several hours of unobstructed daylight. | After a bright day, compare its nighttime runtime with the runtime after a shaded day. |
| 2 | Dirty or obstructed solar panel | Look for dust, pollen, leaves, bird droppings, or other material covering the panel. | Wipe the panel gently with a soft, damp cloth and let it dry. | Allow a full daylight period after cleaning, then check whether the light stays on longer at night. |
| 3 | The light is switched off | Check the power switch or operating mode; some models will not charge or illuminate as expected when switched off. | Set the switch to the recommended operating position. Consult the product instructions if the settings are unclear. | On many models, the light should be on or in its operating mode while charging, even though it will not illuminate in daylight. |
| 4 | Incorrect panel angle or orientation | Check whether the panel faces the strongest available daylight and is not tilted toward a shaded area. | Adjust the angle or position to improve sun exposure; the best orientation depends on location and season. | Compare charging performance over similar sunny days before and after repositioning. |
| 5 | Short winter days or overcast weather | Consider recent daylight hours and weather. Cloud cover and shorter days can reduce the energy reaching the panel. | Place the panel where it receives the clearest available daylight and allow extra time for charging when conditions improve. | Runtime may improve after a longer, sunnier day; reduced performance during cloudy periods does not necessarily indicate a fault. |
| 6 | Battery is worn out or faulty | If the light is several seasons old or still fails after good sunlight and basic checks, the rechargeable battery may have lost capacity. | Check the manual for the specified battery type and replacement procedure. Use only a compatible rechargeable battery. | A fresh, compatible battery that charges and powers the light can indicate that the old battery was the problem. |
| 7 | Battery installed incorrectly or poor contact | With the light switched off, inspect the battery orientation and contacts if the design allows safe access. | Reinsert the battery according to the polarity markings. Clean accessible contacts gently and keep them dry. | After reassembly, leave the light in daylight and check whether normal nighttime operation returns. |
| 8 | Nearby artificial light affects the sensor | At night, check whether a porch light, streetlight, or other bright source shines on the solar light's sensor. | Move the light away from the artificial source or adjust the source so it does not illuminate the sensor. | The light should switch on more reliably after the surrounding area becomes dark. |
| 9 | Moisture, corrosion, or damaged wiring | Look for water inside the housing, corroded contacts, cracked parts, or loose wires. Do not open sealed components unnecessarily. | Switch the light off and follow the manufacturer's care instructions. Replace damaged or unsafe parts rather than using them. | Once a safe connection is restored and the unit has had daylight to charge, check its operation again. |
| 10 | Charging time or expectations are incorrect | Check the product instructions for its charging guidance and remember that charging depends on sunlight, season, and panel position. | Give the light a full day of suitable daylight and avoid judging performance after only a brief exposure or a cloudy day. | Test after sunset in a dark location. A longer or more consistent runtime after stronger daylight suggests the panel is charging the battery. |
Simple charging check: Clean and position the panel in unobstructed daylight, set the light to its recommended operating mode, and test it after dark. Many solar lights do not have a visible charging indicator, so nighttime runtime is a practical sign of charging performance.
A solar light can sit outdoors all day and still receive too little usable sunlight. Shade from a fence, roof edge, or new tree is a common culprit. Even partial shade across a small panel can reduce its charging time. Dust, pollen, and dried bird droppings also block light; wipe the panel gently with a damp cloth and check for cloudy or scratched plastic. Small details matter.
Weather is another factor. Several overcast days can leave the battery undercharged, even when the light appears to work normally. The IEA PVPS Task 13 report on photovoltaic soiling describes measurable energy losses from dust and dirt, though the impact varies by location and cleaning frequency. Battery age matters too. NREL’s analysis of photovoltaic module degradation reports a median rate near 0.5% per year; that figure applies to panels, not small light batteries, but it helps distinguish gradual panel wear from sudden battery failure. A weak, old battery may no longer hold enough charge for the night.
Check the basics. Is the switch set to “on,” and is the panel facing open sky? Some models need a full day of sun after storage or a battery replacement. A nearby porch lamp can also fool the dusk sensor, keeping the light off. That clue is easy to miss. If cleaning, repositioning, and a sunny-day test change nothing, inspect the battery contacts for corrosion or looseness.
How to Troubleshoot Solar Light Charging Problems Step by Step
If your solar lights stay dim or switch off early, check the simple causes first. Set the switch to “on”; some models will not charge while switched off. Move the light where its panel receives several hours of direct sunlight, away from walls, branches, and roof shadows. Window glass can reduce charging, too. Leave it in the sun for a full day, then test it after dusk. One cloudy afternoon may not tell you much.
Next, wipe the panel with a soft, damp cloth and dry it. Dust and bird marks can block sunlight. If the light still fails, check the rechargeable battery compartment for incorrect polarity, loose contacts, or visible corrosion. Replace an old battery only with the type and rechargeable specification listed in the product instructions. Also inspect the sensor and panel for cracks or water inside. A damaged sealed unit may need professional service rather than a risky repair. I once assumed a battery had failed, but a shaded panel was the real problem; it is easy to overlook.
Tips: Test one change at a time, and note whether the light lasts longer each evening. During short winter days, charging may take longer. Don’t force open sealed components. If a clean panel, full sun, and a suitable battery do not help, check the manufacturer’s care instructions or seek qualified assistance.
Reliable charging starts with an unobstructed, clean panel. Wipe it with a soft, damp cloth when dust, pollen, or bird droppings collect; avoid abrasive pads that can scratch the surface. Check after storms, too. Leaves and shifted garden decorations can cast small shadows across the panel.
The IEA PVPS Task 13 review of photovoltaic soiling research reports typical global energy losses of roughly 3–5%, with greater losses in dusty locations. That research concerns larger PV systems, not small garden lights, so the figure is useful context rather than a direct prediction. Small habits matter. Keep panels in direct sun for several hours, and trim nearby growth when it begins to shade them.
Inspect the light every few weeks. Make sure the panel angle faces open sky, and remove water or grime from its edges. Check that the switch is on and the battery compartment is dry and secure. If charging remains weak, test the light in a sunnier spot for two or three days before replacing parts. It is tempting to blame the battery first, but shade, cloudy weather, or a dirty panel may be the real cause. Seasonal sunlight changes, and maintenance cannot make a short winter day longer.
Place the panel in direct sunlight for six to eight hours, then test the light after dusk. Charging can be invisible.
Yes. Keep it clear of porch roofs, leafy branches, and narrow shadows. Even a small shadow can be easy to miss.
Yes. Set the switch to ON, since some lights may not charge in other settings.
Nearby lamps may confuse its light sensor. Turn them off and test the solar light after dusk.
Wipe dust, pollen, water spots, or bird droppings with a soft, damp cloth. Avoid abrasive pads that can scratch it.
Compare it with other lights in the same sunny spot. If just one remains dim, its battery or wiring may need attention.
Follow the product instructions and use a suitable battery tester or multimeter. Never substitute a non-rechargeable battery.
Not right away. Try a sunnier spot for two or three days, and check for shade, dirt, or cloudy weather first. It is easy to blame the battery too soon.
Solar lights rely on a simple cycle: their panels collect sunlight, a rechargeable battery stores the energy, and the stored power runs the light after dark. If you’re wondering, “why are my solar lights not charging,” start by checking whether the panel receives strong, direct daylight and whether the indicator or light behavior suggests the battery is gaining power. A shaded location, dirt on the panel, a depleted or aging battery, a loose connection, or an incorrectly set switch can interrupt charging.
Troubleshoot one cause at a time. Clean the panel gently, move the light to a sunnier spot, confirm its switch and settings, and inspect accessible connections and battery placement. Allow time in daylight to see whether performance improves. For more reliable charging, keep panels clear of dust, leaves, and snow, position them to receive ample sun, and replace worn batteries when needed. Regular checks can help solar lights store energy consistently and provide dependable illumination at night.

Soluxa Light