Solar garden lights add a gentle glow to paths, patios, and flower beds. Yet dust, pollen, rain spots, and insect residue can slowly reduce their brightness. Learning how to clean solar garden lights helps protect their panels and keeps evening lighting more dependable.
In my experience, most lights need only a soft cloth, warm water, and mild soap. Harsh cleaners may cloud plastic covers or damage protective surfaces. Turn each light off, remove loose dirt, and inspect the panel before wiping it. A cotton swab can reach narrow edges where grime often hides. Dry every part completely before returning the light outdoors.
Small details matter. Check for cracked covers, rusty contacts, or water trapped inside the housing. Cleaning cannot repair every fault. Sometimes, a weak battery is the real problem. That possibility is easy to overlook. Do not scrub aggressively, especially around the solar panel and wiring. Gentle pressure usually works better.
This guide shares seven practical tips based on common outdoor maintenance methods and careful product handling. It explains how to clean different surfaces, improve sunlight exposure, and avoid mistakes that shorten a light’s life. Results may vary because garden conditions differ. A shaded yard, heavy pollen, or coastal air can require more frequent care. Take a moment to observe the light before cleaning it. That simple habit can prevent unnecessary damage.
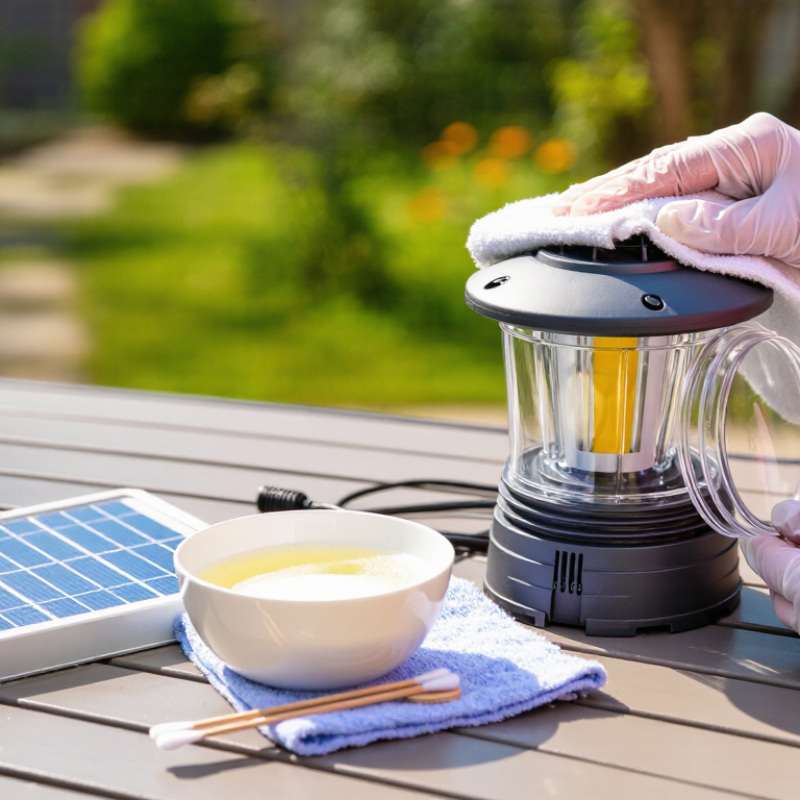
Before cleaning solar garden lights, switch them off and remove them from the soil. Let hot fixtures cool completely. Moisture and electricity are poor companions. Check the panel, housing, cable, and battery cover for cracks. Do not clean a damaged light until it is professionally assessed.
Prepare a microfiber cloth, a soft toothbrush, lukewarm water, and a small amount of mild soap. Avoid abrasive powders, strong solvents, pressure washers, and metal tools. They can scratch the panel or weaken waterproof seals. The IEA PVPS Task 13 report identifies average global soiling losses of roughly 3–4% for photovoltaic systems, although local dust and pollen can create larger losses. Clean panels matter, but aggressive cleaning can cause more damage than dirt.
Use a dry cloth first. It removes loose grit without dragging particles across the surface. Then wipe gently with diluted soap and rinse with a damp cloth. Keep water away from open battery compartments. Remove the battery only if the manufacturer’s instructions allow it. I often see people forget this small step. It is easy to underestimate hidden moisture. Let every part dry fully before reassembly, preferably in shade. Check the light again after one evening, because a clean panel cannot repair a weak battery or damaged seal.
Estimated time needed for each cleaning step when preparing the lights and using safe supplies such as a soft cloth, clean water, and mild soap.
Use gentle materials, avoid abrasive cleaners and solvents, and allow the lights to dry completely before reinstalling them.
Before cleaning solar garden lights, switch off the lights and remove accessible components. Take out the battery, if the compartment allows it. Detach the clear cover, panel, or decorative shade without forcing clips. Place small screws in a shallow tray. This prevents water from reaching electrical contacts during cleaning. The IEA PVPS Task 13 report estimates average photovoltaic soiling losses at about 3–4% globally, although local losses can become much higher. Even a thin film of dust can reduce charging performance.
Tip: Photograph each part before removal. It helps when clips look identical. Wipe the solar panel with a soft, damp microfiber cloth. Use clean water and mild soap only when greasy residue remains. Avoid abrasive pads, strong solvents, and high-pressure sprays. They can scratch the panel or push moisture into seals. I usually clean from the panel edge toward the center, but this is not always perfect. A second gentle pass may be necessary.
Check the battery compartment for white residue, rust, or dampness. Do not scrape aggressively. A dry cotton swab can remove loose residue from accessible areas. Let every component air-dry completely before reassembly. The U.S. Department of Energy notes that shading and surface dirt can lower solar-device energy collection, so inspect nearby leaves and soil as well. Clean on a cool, cloudy day. Hot surfaces dry too quickly and leave streaks. Test the light after dark, not immediately after reassembly.
Cleaning the solar panel matters more than polishing the lamp housing. IEA PVPS Task 13 reports that soiling can reduce solar energy output by 2–7% annually. Dust, pollen, bird residue, and oily fingerprints can block sunlight. Small panels show the effect quickly. The light may glow weakly or shut off earlier.
Turn off the light and remove its battery before cleaning. I once wiped a dusty panel while it was dry, leaving fine marks across the plastic. Do not repeat that mistake.
Rinse loose dirt with clean water first. Use a soft microfiber cloth, warm water, and one drop of mild dish soap. Wipe gently in straight movements.
Avoid abrasive sponges, paper towels, solvents, and strong glass cleaners. They can scratch or cloud the surface.
Rinse away soap completely. Dry the panel with a fresh, soft cloth. Never press hard around sealed edges. Check for cracks, loose covers, or trapped moisture afterward.
NREL’s photovoltaic soiling research shows that cleaning benefits vary with dust levels, rainfall, and panel angle. Therefore, inspect outdoor lights monthly, especially near roads, trees, or construction.
Cleaning every few weeks may be excessive in rainy areas. That is the part I still reconsider. Use less water when rain already does the work.
Solar garden lights collect dust, pollen, bird residue, and mineral spots. These deposits can block sunlight from reaching the panel. IEA PVPS Task 13 reports that soiling can cause average annual losses of 2–4% in photovoltaic systems. Small lights may lose useful charging time even faster because their panels are tiny.
Turn off each light and remove it from wet soil before cleaning. Wipe the housing and solar panel with a soft, damp microfiber cloth. Use mild soap for sticky dirt, then rinse the cloth carefully. Do not pour water directly into seams or switches. I once scrubbed a cloudy panel too firmly and left fine marks. Gentle pressure works better. Dry the housing completely before opening the battery compartment.
Tips:
Clean at dusk, not under intense midday heat. Check the compartment for rust, white residue, loose contacts, or trapped moisture. Replace damaged seals, but never force a stuck cover. IEC 60529 guidance explains that water-resistance ratings depend on tested conditions, not permanent protection. Therefore, avoid soaking lights, even when they appear weather-resistant. Remove rechargeable batteries only when the compartment is dry, and follow the stated battery type and polarity. A small cotton swab can clean contacts, but stop if corrosion has spread. Inspect again after heavy rain.
After cleaning solar garden lights, reassemble each unit only when every part is completely dry. Moisture trapped inside the lens can cause cloudy glass, corrosion, or a weak night-time glow. Seat the rubber gasket evenly around the cover, without stretching it. Then, tighten screws until snug, not forcefully. Overtightening can crack thin plastic or flatten the seal. Keep the solar panel facing upward and confirm its cable sits away from the battery compartment. I once rushed this step and pinched a wire beneath the cover. The light worked, but its charge faded after several nights. That mistake reminded me to inspect the edges before closing anything.
Test the light in a dark area, or cover the panel with a thick cloth. Allow several minutes for the sensor to activate. Check for steady illumination, secure connections, and a panel free from fingerprints. A flicker often points to moisture, a loose contact, or a tired rechargeable battery. Do not mix battery types or force a swollen cell into the holder. Every month, wipe dust from the panel with a soft, slightly damp cloth. After rain, examine the seal and remove standing water around the base. In winter, shorter daylight may reduce brightness; that is normal, though I sometimes blame the battery too quickly. Replace worn seals and batteries according to the light’s instructions, then retest before returning the fixture outdoors.
Switch off the lights and remove them from the soil. Let hot fixtures cool completely. Check the housing, cable, panel, and battery cover for cracks. Do not clean damaged lights before professional assessment.
Use a microfiber cloth, soft toothbrush, lukewarm water, and mild soap. Avoid abrasive powders, metal tools, strong solvents, and pressure washers. Keep it gentle.
Remove loose grit with a dry cloth. Then wipe gently with a damp microfiber cloth. Use diluted soap only for greasy residue. Wipe from the panel edge toward the center.
Keep water away from open battery compartments and electrical contacts. Remove the battery only when the instructions allow it. A dry cotton swab can remove loose residue. Let it dry fully.
Remove accessible covers, shades, or panels without forcing clips. Place small screws in a shallow tray. Take a quick photograph before removal. It helps when similar clips become confusing.
Dust, pollen, leaves, and nearby shade can reduce energy collection. Global losses are often around three to four percent, but local effects vary. A thin dusty film can matter.
Reassemble only when every part is completely dry. Seat the rubber gasket evenly. Tighten screws until snug, not forcefully. Keep the cable away from the battery compartment.
Test it after dark or cover the panel with a thick cloth. Wait several minutes for the sensor to activate. Check for steady light, secure connections, and clean surfaces.
Flickering may indicate moisture, a loose contact, or a tired rechargeable battery. Winter darkness can also reduce brightness. I sometimes blame the battery too quickly. Check the seal first.
Wipe the panel monthly with a soft, slightly damp cloth. After rain, remove standing water near the base. Replace worn seals or batteries according to the instructions. Retest before outdoor use.
Learning how to clean solar garden lights is a simple way to improve their appearance and help them work more efficiently. Start by switching off the lights and preparing gentle supplies such as a soft cloth, mild soap, clean water, and a soft brush. Remove any accessible parts carefully, keeping small components organized. Wipe the solar panels with a damp, non-abrasive cloth to remove dust and dirt without scratching the surface. Avoid harsh chemicals and excessive pressure, as these may damage the panel.
Next, wash the light housing and gently clean around the battery compartment. Check for moisture, corrosion, or loose connections, and allow all parts to dry completely before reassembly. Once the lights are put back together, place them where they can receive sufficient sunlight and test their operation after dark. Regular cleaning, battery checks, and occasional inspections can help maintain brightness, extend service life, and keep the lights looking neat throughout the year.

Soluxa Light