Solar lights can fail quietly. The panel still catches sunlight, yet the lamp stays dark at night. If you are asking, “why do solar lights stop working,” the answer usually involves a weak rechargeable battery, dirty photovoltaic cells, a blocked sensor, or corroded contacts. Weather matters too. A shaded panel may receive only a thin beam of afternoon light. A cracked battery compartment can collect rainwater. Even a small film of dust can reduce charging performance.
The International Renewable Energy Agency reported 1,419 gigawatts of global solar capacity by the end of 2023. That growth shows solar technology is expanding, but small outdoor lights still depend on simple components and careful maintenance. The World Bank’s Lighting Global program also stresses the importance of product quality, battery performance, and real-world durability in off-grid lighting. As IEA Executive Director Fatih Birol stated, “Solar is now the cheapest electricity in history.” That does not mean every solar light is maintenance-free.
A practical repair begins with observation. Clean the panel with a soft, damp cloth. Move the light away from porch lighting, which may confuse its dusk sensor. Then inspect the battery for swelling, leakage, or rust. Replace it with the same voltage and chemistry. Do not guess.
Some guides oversimplify the problem. A battery swap may not solve a failed charging circuit. This guide examines each likely cause, from seasonal sunlight and hidden switches to water damage and aging LEDs. You will learn what can be fixed safely, what needs testing, and when replacing the unit makes more sense. Expect a few imperfect cases. Real outdoor conditions rarely follow the instruction manual.
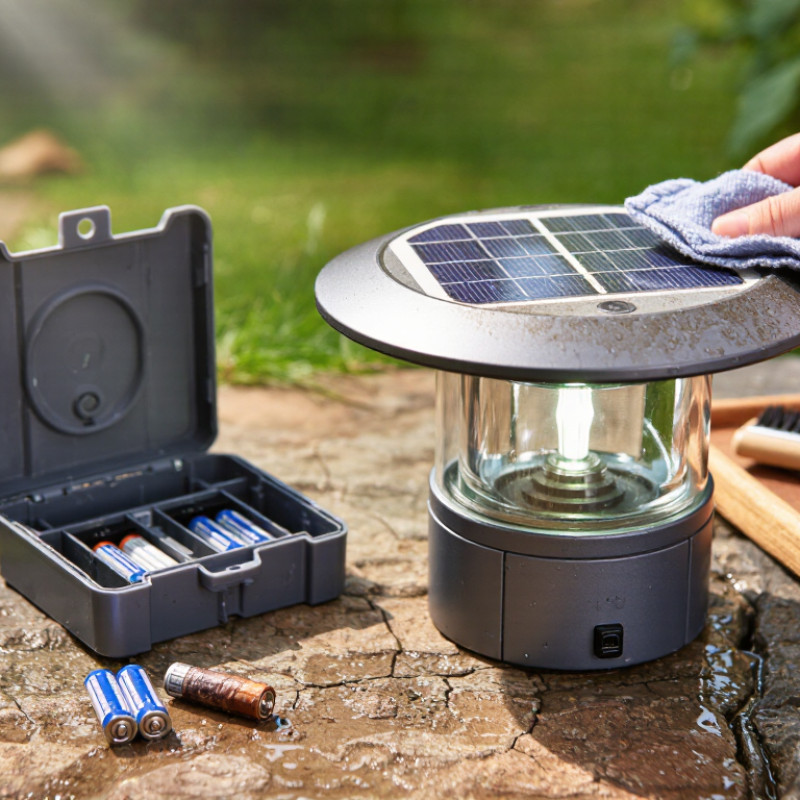
How to Fix Solar Lights That Stop Working
Identify why the solar lights stopped working before replacing parts. Check the power switch, which may sit beneath the housing or near the battery compartment. Test the light after covering its panel completely. If it turns on, the sensor works, but daylight may be confusing it. Move nearby lamps or reflective surfaces away from the panel.
Inspect the solar panel for dust, leaves, or cloudy plastic. Wipe it gently with a damp cloth, then let it dry fully. A shaded location can reduce charging, especially during winter. Examine the battery compartment for loose contacts, rust, or moisture. Rechargeable batteries usually lose capacity after repeated cycles, so replacing an old battery may restore normal operation. I once blamed the battery immediately, but a loose contact caused the real problem. That mistake was avoidable.
Tips: Leave the light in direct sunlight for one full day after cleaning. Check it again after sunset. If it still fails, test the battery with a suitable meter and compare its reading with the battery’s stated voltage. Do not force corroded parts. Severe corrosion or cracked wiring may require a qualified repair technician. Also inspect the seal around the housing. Small gaps can admit rain, even when the outside looks dry.
| Possible Cause | Typical Signs | How to Check | Recommended Fix | Prevention or Maintenance |
|---|---|---|---|---|
| Power switch is turned off | The light does not turn on at night, and there is no visible damage. | Locate the switch and check whether it is set to ON. Cover the solar panel to simulate darkness. | Turn the switch on and allow the battery to charge in direct sunlight during the day. | Check the switch whenever the light is moved, cleaned, or stored. |
| Insufficient sunlight | The light works for a short time, appears dim, or fails after several cloudy days. | Observe whether the panel is shaded by trees, buildings, fences, or other outdoor fixtures for part of the day. | Move the light to a location with several hours of unobstructed daylight. Keep the panel facing the brightest part of the sky. | Trim nearby vegetation and reassess the location as the sun’s position changes by season. |
| Dirty or obstructed solar panel | The panel looks dusty, muddy, cloudy, or covered by leaves, snow, or bird droppings. | Inspect the panel surface in daylight and check whether the light sensor is also blocked. | Gently clean the panel with a soft, damp cloth and mild soapy water. Dry it completely before testing. | Clean the panel periodically and avoid abrasive cleaners or rough tools that can scratch the surface. |
| Rechargeable battery is depleted or worn out | The light is dim, runs briefly, or stops working even after a sunny day. | Check the battery compartment for corrosion, leakage, swelling, or a battery that no longer holds a charge. Confirm the replacement type and voltage from the product label or manual. | Replace the rechargeable battery only with a compatible type, chemistry, voltage, and size. Do not use ordinary non-rechargeable batteries. | Keep the compartment dry and recycle old rechargeable batteries through an appropriate collection service. |
| Battery contacts are corroded or loose | The light works intermittently, or white, green, or brown residue is visible near the battery terminals. | Turn the unit off, remove the battery, and inspect the contacts for residue, rust, bent tabs, or poor contact. | For minor residue, clean the contacts carefully with an appropriate electronics contact cleaner or a dry abrasive swab. Replace badly corroded parts or the entire unit if necessary. | Prevent water from entering the battery compartment and replace damaged seals or covers. |
| Light sensor is blocked or malfunctioning | The light stays off at night, stays on during the day, or turns on at unexpected times. | Clean the sensor area and cover the panel or sensor in daylight. Nearby artificial light may also prevent activation. | Remove obstructions, reposition the light away from bright night lighting, and replace the sensor or control module if it has failed. | Keep the sensor exposed and avoid installing the light directly beneath porch lamps or street lighting. |
| Water or moisture entered the housing | Condensation, water droplets, rust, flickering, or sudden failure appears after rain or washing. | Inspect seams, covers, cable openings, and the battery compartment for cracks or damaged gaskets. | Switch the light off, remove the battery if accessible, and let the unit dry fully. Replace damaged seals or the light if water has reached the circuit board. | Do not submerge the light, avoid high-pressure water, and install it according to its outdoor protection rating. |
| LED or internal circuit has failed | The battery charges and the switch works, but the lamp remains dark or only a few LEDs illuminate. | Test the unit after a full sunny-day charge and inspect for burnt components, broken wires, or visible impact damage. | Replace the LED module or light assembly if the design allows it. Circuit-board repairs should be performed only by a qualified technician. | Protect the light from impacts, excessive heat, flooding, and unauthorized modifications. |
| Extreme temperature conditions | Runtime decreases during very cold weather, or the light stops after prolonged heat exposure. | Compare performance in moderate weather and check whether the battery compartment is exposed to direct heat or freezing conditions. | Allow the unit to return to a moderate temperature. Replace a battery that has been damaged by heat, freezing, swelling, or leakage. | Install the light in a ventilated position and follow the temperature range specified in its instructions. |
| Physical damage or loose wiring | The light flickers after movement, has cracked plastic, or shows a loose cable or connector. | With the power off, examine the housing, wiring, connectors, and mounting points without pulling on the cables. | Reconnect a loose plug if it is designed to be detachable. Replace damaged wiring or the complete unit rather than bypassing safety components. | Mount the light securely and avoid placing pressure on cables during installation or cleaning. |
| Nightly operating time is set too high for available charge | The light works at dusk but becomes dim or turns off before morning. | Check whether the unit has brightness, motion, timer, or operating-mode settings. | Use a lower brightness or a motion-activated mode if available, then allow the battery to recharge fully. | Choose an operating mode that matches the available sunlight and the required nighttime coverage. |
Check the switch, sensor, battery, wiring, and panel before replacing parts. Sudden darkness often means a connection problem.
Set the switch to “ON.” Cover the panel or sensor with thick cloth. Wait several seconds. The lamp should activate.
The sensor probably works. Nearby lamps or reflective surfaces may confuse it. Move them away from the panel.
Wipe dust, leaves, and cloudy plastic with a damp cloth. Let the panel dry completely. Then leave it in direct sunlight for one day.
Yes. A shaded panel receives less energy, especially during winter. A wall, tree, or roof may block useful sunlight.
Look for loose contacts, rust, moisture, or damaged seals. Rechargeable batteries may lose capacity after many charging cycles.
Not always. I once blamed the battery, but a loose contact caused the failure. Check connections first, then test the battery with a suitable meter.
Inspect green corrosion, cracked insulation, loose terminals, and trapped water. Gently pull each connector. Movement may indicate poor contact.
Stop if parts are severely corroded or wiring is cracked. Do not force damaged components. A qualified technician may need to inspect them.
Some controllers use a short delay. Test again after sunset, after cleaning, and after a full sunny day. My first conclusion was not always correct.
Solar lights can stop working for several simple reasons, and identifying the cause is the first step toward a reliable fix. If you are wondering, “why do solar lights stop working,” begin by checking whether the panel receives enough direct sunlight and whether the light is switched on. Dirt, dust, leaves, or other debris can block the panel and reduce charging efficiency, so clean it gently with a soft, damp cloth. Also inspect the light for moisture, physical damage, or signs of corrosion.
If cleaning does not solve the problem, test the rechargeable batteries, since old or damaged batteries are a common cause of failure. Replace them with compatible rechargeable batteries when necessary. Next, check the light sensor, power switch, and wiring for loose connections or visible damage. Carefully reconnect or repair minor issues, but replace parts that are badly damaged or unsafe to use. With regular cleaning, battery checks, and basic maintenance, most solar lights can be restored to normal operation and continue working effectively.

 Soluxa Light